如何建立本站
简介
Hexo 是一个快速、简洁且高效的博客框架。Hexo 使用 Markdown(或其他渲染引擎)解析文章,在几秒内,即可利用靓丽的主题生成静态网页。
本文以hexo_test为工作目录
hexo框架
参考官网链接
安装
1 | #curl -sL https://deb.nodesource.com/setup_14.x | sudo -E bash - |
测试
生成hexo默认的blog页面cd hexo_testhexo init myblogcd myblognpm install
这一步会出现下面的warn,这是warning,是因为mac下需要 fsevents,在windows或linux环境下,请忽略这个错误。
hexo cleanhexo g
如果是在本地安装,打开浏览器,输入 http://localhost:4000 即可查看页面hexo s # default port is 4000sudo hexo s -p 80 # specify port is 80
配置
基础配置
无法显示图片改这个
url: http://chasentech.com/blog2博客插入图片
参考链接博客文章加密
配置next主题
选择了好几个主题之后,感觉next简洁明了
部署
cd hexo_test
1 | # 8.3.0会报错 |
git clone --branch v8.18.0 https://github.com/next-theme/hexo-theme-next themes/nextvim _config.yml # 修改主题为next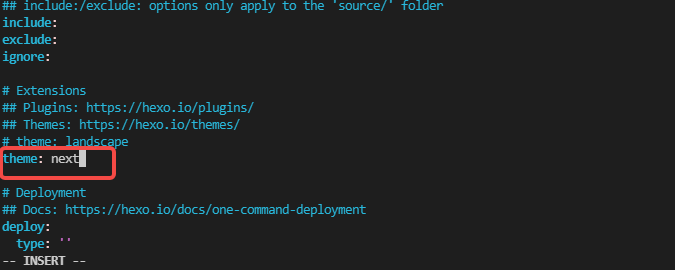
hexo c && hexo g
配置
配置文件
扩展
配置参考教程
33个配置技巧
next首页自定义
链接样式修改
next自定义修改
添加page topic
……自定义主页
参考 链接
a. source目录下,新建一个index.md文档
b. 根目录下的_config.yml文件的index_generator下面的path项,改为一个无效值,
eg.
index_generator:
path: ‘’
index_generator:
path: ‘/default-index’
c. 修改NexT主题的配置文件(themes/next/_config.yml文件)的Home菜单指向的链接也就是打开home标签
把#home: / || fa fa-home
改为home: / || fa fa-home
- 访客统计
打开\themes\next\layout_partials\footer.swig文件
1 | ...... |
在这里有两中不同计算方式的统计代码:
- pv的方式,单个用户连续点击n篇文章,记录n次访问量
- uv的方式,单个用户连续点击n篇文章,只记录1次访客数
网站底部加备案号??
文章加密访问有新方式?
https://zhuanlan.zhihu.com/p/31877891
打开themes->next->layout->_partials->head.swig文件,在以下位置插入这样一段代码:
(blog/themes/next/layout/_partials/head/head-unique.njk)
1 | <script> |
然后在文章上写成类似这样:
password: xxxxx
abstract: xxxxx
message: 输入密码,查看文章
- 超链接颜色更改
360急速浏览器不支持,edge浏览器才行,搞了半天1
2
3
4
5
6
7
8
9
10
11
12
13
14# /themes/next/source/css/_common/components/post/post-body.styl
......
width: 100%;
}
}
a:not(.btn) {
color: #0477ab;
border-bottom: none;
&:hover {
color: #0477ab;
text-decoration: underline;
}
}
}
如何发布文章
1 | cd hexo_test |